Posted: March 22nd, 2012 | Author: admin | Filed under: Uncategorized | Comments Off on Vic is eeWeb’s Featured Engineer
 eeWeb run a great series on engineers in the community, and Vic is this issue’s Featured Engineer! It”s a great interview, covering not just technical stuff – although there’s that too. From the article:
Do you have any tricks up your sleeve?
One of my favorite low-level “tricks†is that you can swap the values of two variables without using a temporary variable in three lines and using only XOR (exclusive-or) operations. For example in C:
uint16_t x = 2322; uint16_t y = 12314; x ^= y; y ^= x; x ^= y;
After this sequence of magical operations, y = 2322 and x = 12314. Proof that this works is left as an exercise to the reader! I have a certain fondness for these types of bit-manipulations.
He taught me this nifty trick too. For the curious, the photo has Wicked Device’s lab bench in the background. That’s where we designed pretty much everything we sell. To the right is a sewing pattern on the wall, an artifact from before the space was taken for a solder station.
Posted: March 14th, 2012 | Author: admin | Filed under: Sketchgarden | Tags: SketchGarden | Comments Off on Sketch Garden cranking it out
Many of you have been following our work on Sketch Garden, a way to upload sketches to your Nanode over the internet. We are starting to get successful uploads happening from some early beta testers, which is great. First upload goes to Jaren Havell who tweeted:
Jaren Havell †@j_jwalrus
My nanode just updated its arduino sketch…over the Internet! Sketchgarden.co working like a charm!
Congratulations Jaren, and keep it up!
Posted: February 21st, 2012 | Author: admin | Filed under: Uncategorized | Comments Off on How to ground your circuit
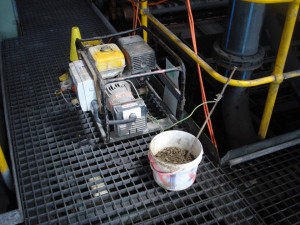 Thanks Imgur
Posted: February 2nd, 2012 | Author: admin | Filed under: Uncategorized | Comments Off on Boarduino shield in action
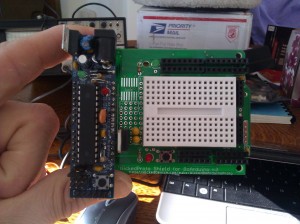
Jeff wrote in to show us how he is using the Boarduino shield to help get 3.3v, which the BoArduino does not provide.
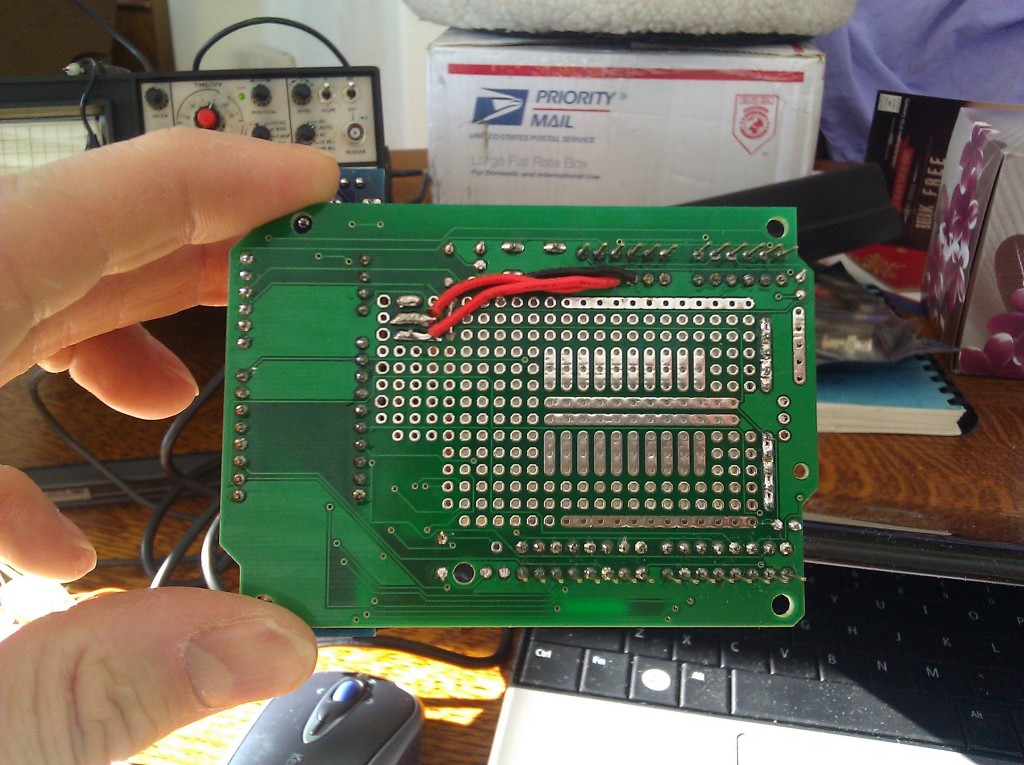
He solved the problem by using the BoArduino shield and adding a LM1117T-3.3 into the prototyping area. Nothing big, but just an example of how the protoboard makes a small hack simpler. Thanks for writing us, Jeff
Posted: January 1st, 2012 | Author: admin | Filed under: Uncategorized | Comments Off on Ruby Rails on Windows (actually Ubuntu, it turns out)
or: How I solved the problems of Ruby-Rails performance on a Windows laptop.
I have been finding running rspec tests in Rails to be very slow – 81 seconds to run a small suite. Some research revealed that this is probably because Rails is starting up each time, and it has a bunch of files to open. On Windows, this is slow. Hence slow test running.
My general rule of software development is: For stuff you do every day, if it can save you 2 mintues a day, it is worth spending a day fixing it. Well, I’ll run tests a LOT. So this clearly fits the bill. Off we go!
There are a bunch of suggestions as to how to speed up Rails on Windows, but none of them grabbed me. Also, I don’t know of an rvm equivalent (pik did not work nicely for me). The solution was extreme, but seems to be working well: Run a virtual Ubuntu machine on Windows, and do all testing there.
The steps:
- Download and install VirtualBox.
- Download and burn a CD of Ubuntu
- Create a virtual machine. I chose a 32GB fixed size disk, and a full Rails environment uses 12 – 14% of that.
- Run the environment. A first-run script will start up and ask you to install Ubuntu, so do that. This takes awhile.
- (optional) At this or any future time you can choose to use shared folders with your Windows installation. This will let you develop in Windows and test in Linux.
.
You need to install Guest Additions to do this from the Device menu. Note that clicking the menu item just mounts the image you need – it does not actually do the install. You need to do that yourself. When doing so, make sure that you run the VirtualBox guest additions as root, otherwise it will do nothing. I ran them from the command line using sudo:
cd /media (… I think.)
sudo sh ./VBoxLinuxAdditions.run

and restart.

Then you need to add the share, also from the Device menu. Say "make permanent" and add automatically/at startup. Then it will be available in /media.

BUT ... you won't be able to access it, because you need to add yourself to the group:

sudo usermod -a -G vboxsf <your-username>

Then restart again, because groups are only picked up at login.

.

Now we can get to the actual meat of the install: ...
- Follow these instructions.You need to install curl first:sudo apt-get install curl
The first line has a typo – it needs a close paren. So the command is:
bash …blah blah blah…. )
rvm install ruby-head will install Ruby 2.0 right now. Go with this for now.
Running rvm requirements should show you a bunch of gems to install – maybe 20 or so. Look carefully for this list – it is not just the list of 2 or 3 at the top.
Skip the solarized-shell part if you want.
Finally, I installed RubyMine, but Sublime2 is nice too.
- You’re done!!
.
.
.
Haha – kidding! It just looks like it.
.
.
.
.
.
.
- If you try to create a rails project and run it now, it won’t work for several reasons. First of these is we need to be using Ruby 1.9.3. So type:
rvm 1.9.3
To switch. Gotta love rvm.
- Now you can create a project with rails new testapp or whatever you want. I imported my app from subversion.
- Run bundle install to see how things work out. It should work fine. Try “rails s”
- Â Next, it will complain “rails could not find a javascript runtime” and such like. You can fix this by installing node.js. Instructions.
- OK …. Now you should be all set.
Remember that 81 seconds I told you about? Well bundle exec rspec now runs in 5 seconds. A pretty big improvement.
Good luck and enjoy.
PS:
- Host-L will suppress the background, so it looks like your virtual box is just another window. “Host” is usually right-Control key. At first it takes over your whole screen.
- Ctrl-Alt-T brings up a terminal.
Posted: November 25th, 2011 | Author: admin | Filed under: Uncategorized | Comments Off on Black Friday 15% off
15% off ALL products on Black Friday. Use coupon code: BLACKFRIDAY.
Posted: November 17th, 2011 | Author: admin | Filed under: Uncategorized | Comments Off on Special on Nanode Kit
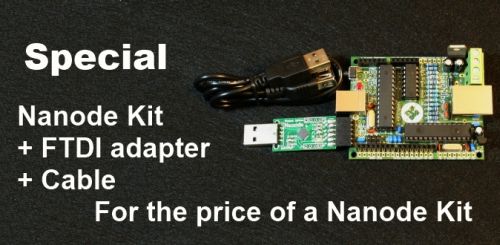
Nanode Kits are usually $39.99 – which is a great deal for a web enabled Arduino clone. Right now we are offering the Nanode Kit and an FTDI adapter and a USB cable for the same price.
You get the adapter and cable for free. FTDI adapters usually cost $14 or more, and USB cables are about $4 – $6. This is an AMAZING deal.
Most stores have a black Friday sale, but we know you want to have it in your hands by then, so you can enjoy it over the long weekend. Happy thanksgiving folks!
Posted: November 7th, 2011 | Author: Vic | Filed under: Software | Tags: advanced, debug, howto, nanode, network, software | Comments Off on Debugging Network Software

I want to spend a couple paragraphs writing about Networks and debugging code running on the Nanode (or Arduino Ethernet for fthat matter) that uses them. I realize this blog entry is not for everyone, and probably will get it’s share of <yawns>, but it’s super important knowledge for when everything doesn’t go your way on networks. With Arduino sketches, you are kind of stuck with Serial.print(...) and LEDs to get insight into what’s going on, but that’s really pretty ineffective when it comes to network interactions. Honestly, for most users the network stuff better “just work” or they are going to be turned off pretty quickly. I , however, am not one to throw in the towel when the networking stuff doesn’t work, and hopefully I can shed some light onto what can be a shadowy space in the programming / debugging landscape. There’s no substitute for using the right tool for the job.
So given that printing to the console can only get you so far with network code debugging, what is a perplexed programmer to do? Well your best choice at that point is to look at what’s going on “on the wire.” In most realms, that means busting out an oscilloscope or logic analyzer, but in the networking world, we have much better / more appropriate tools available for the job. There’s an excellent, indispensible, and free(!) program called WireShark that you can download for just about any platform. WireShark allows you to capture all the traffic on any Ethernet interface (e.g. your network card) and dig into the details of the packets, which, I might add, it conveniently parses out for you for all but the most obscure protocols. You can also set up your capture with filters on pretty much anything you can imagine related to the packet contents (MAC addresses, IP addresses, whatever). And get this, you can check a box in the capture that will have your network card capture all the traffic that it sees (not just the stuff destined for it).
Here’s the rub, though. Unfortunately (or fortunately depending on your perspective) most networks today are equiped with “smart switches,” which eliminate collision domains, which means your network card only ever “sees” those packets which are legitimately destined for it (or broadcast / multicast). So while Wireshark is an awesome tool, it alone can probably not help you debug what’s going wrong with your Nanode software. To unleash the debugging power of WireShark on your Nanode, you’re going to need some “dummer” hardware, namely an Ethernet Hub. Good luck finding one at a retail store – I had to resort to the E-bay for mine, and got an 8-port hub for about $10.
A Hub is very similar to a switch in that it gives you more places to plug into your network. The big difference with a hub is that it internally connects all the ethernet wires together (well sort of) so that all the devices connected to the hub get to “see” each others packets, unfettered by the intelligent filtering of a switch. So if you plug in the ethernet cable from your computer into the hub, plug in the ethernet cable from your Nanode into the hub, connect your hub to your router, and run WireShark, both your computer and your Nanode should be able to get “on the internet.” More importantly, your computer running WireShark will be able to “snoop” on the internet traffic going to and from your Nanode! Now we’re in business. Often times you can look at what the network traffic is supposed to look like using your computer (by filtering on traffic coming to/from your computer’s MAC address for example) and all the fancy-pants network tools that come with it (especially if you’re on a linux box), then compare that to what happens when your Nanode participates in an analogous network exchange (by filtering on the Nanode’s MAC address for example).
Armed with these tools (and some practice, and some reading about protocols), you’ll be able to get to the bottom of your network problems in no time!
Posted: October 27th, 2011 | Author: admin | Filed under: Uncategorized | Comments Off on Where are we?
 Wow. Since I last posted, I have been to Kenya to present at the African Leadership conference, NYC (twice), and Austin, Tx, my first time there. On that note: When visiting Austin, I recommend you bring your appetite. Also, go check out the batcow. It rocks. Austin is pretty cool too.
The more we do the less time we have to blog about it. We are in heavy development mode of sketchgarden, so have our heads down.
Posted: September 23rd, 2011 | Author: Vic | Filed under: Uncategorized | Comments Off on A Spin on previous Nanode + Pachube Sketch

Nanode
Due to popular demand I made some mods to the sketch I previously posted, which was receiving data from the Wicked Node and posting it to Pachube using the Nanode‘s excellent internet connectedness. The version I’m posting with in this blog entry has no dependence on the WickedReceiver library and instead posts the Nanode’s native Analog sensor input readings to Pachube.
As a technical note on this one, Pachube rate limits the number of posts it will accept and we were exploiting the transmit interval of the Wicked Node in the previous sketch to throttle our posts to Pachube. In this sketch we have to be a bit more explicit in our throttling using the timestamp technique.
Make sure you get the latest and greatest EtherShield Arduino library from Andrew Lindsay’s (@thiseldo) GitHub repository. It contains some important fixes with respect to TCP, DHCP, and DNS that I ran into in my initial development. Check out the code and it should make pretty good sense, all the settings are up top just like before. Enjoy!
Cheers, Vic
Download: PachubeV3_WithoutNode

Pachube
 Update: 12/14/2012 – The EtherShield library was retired earlier this year in favor of the EtherCard library. At some point I may get around to making another update to this post, but the EtherCard library already comes with a pretty easy to follow Cosm (the new name for Pachube) sketch. As always, feel free to post to our forum if you have questions.
 eeWeb run a great series on engineers in the community, and Vic is this issue’s Featured Engineer! It”s a great interview, covering not just technical stuff – although there’s that too. From the article:


